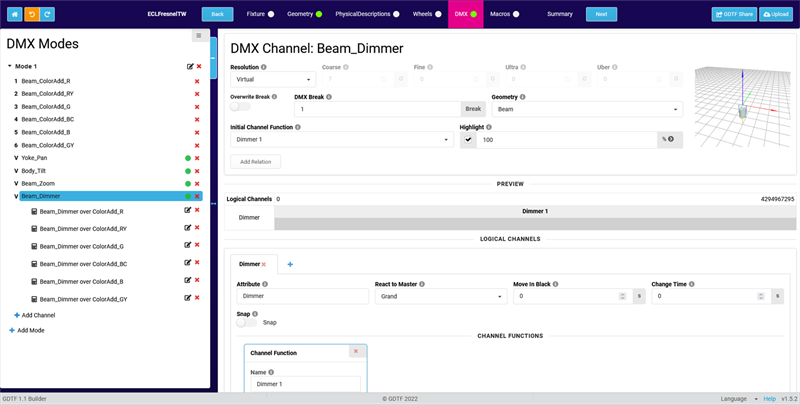
Virtual channels are channels which don't have a DMX address assigned and therefore don't generate DMX output.
Some use cases for virtual channels are:
- Pan, Tilt, Zoom, Focus and Shaper channels in conventional fixtures to focus such fixtures "manually" in a visualiser
- Virtual Dimmer channel which scales the output of the additive color mixing channels
If your (sub)fixture does not feature a real Dimmer channel, but only additive color mixing channels, you should add a virtual Dimmer channel to tell a lighting console how to control the intensity of this (sub)fixture.
This chapter describes how to create virtual channels for a Fresnel fixture including a virtual dimmer.
Geometries
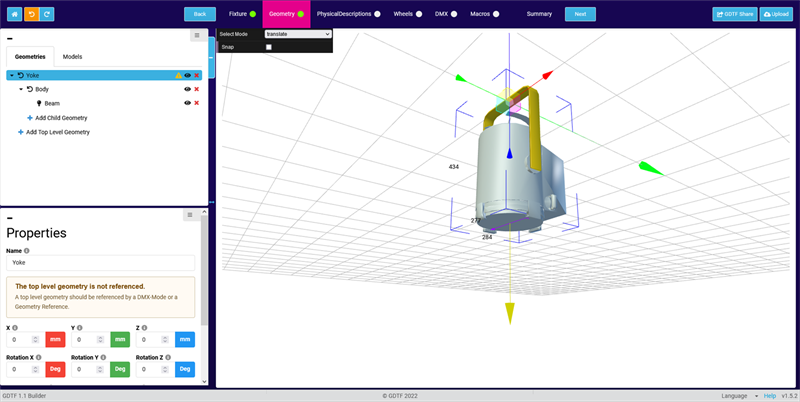
In order to create virtual Pan and Tilt channels, we need two geometries of the Axis type. In this case, the "Yoke" will rotate around the Pan axis and the "Body" will rotate around the Tilt axis. Just like in a moving light, but with different models of course.
Learn more about how to create geometries in the
Add Geometries chapter.
Your geometries could look like this:
DMX Channels
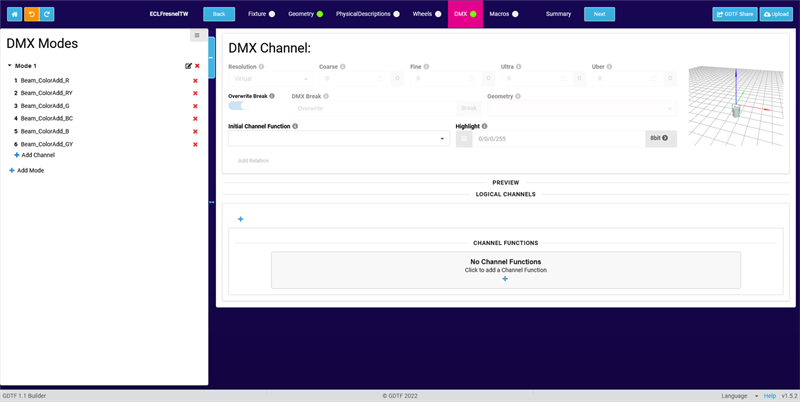
Assuming that you have already created a DMX mode with additive color channels, we will now add virtual Pan/Tilt, Zoom and Dimmer channels.
Pan/Tilt
- To create the Pan channel, click on Add Channel in the left column.
The Add New Channel pop-up opens.
- For Geometry, select the geometry which rotates around the Pan axis (in this case the "Yoke").
Then click in the Attribute field. The Select Attribute pop-up opens.
- Search for the Pan attribute, select it and confirm both pop-ups by clicking OK.
- Back on the DMX page in the newly created Pan channel, set the Resolution to Virtual.

The virtual resolution of this channel is also indicated in the DMX Modes list by the V prefix.
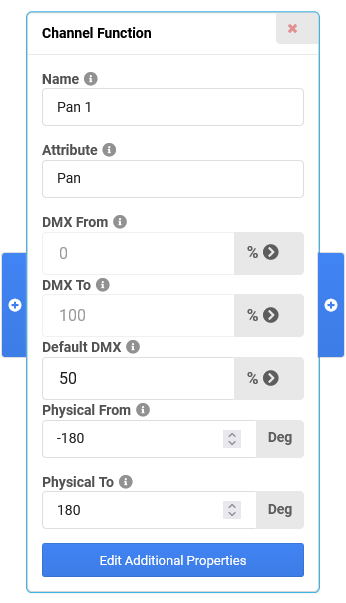
- In the Channel Function of the Pan channel, set the Physical From and Physical To values as needed, for example From -180 Deg, To 180 Deg.
Adjust the Default DMX value (as percentage of the physical range) to the value which corresponds to Physical 0 Deg, in this case 50%.
- For the Tilt channel, repeat the steps above, but choose the Tilt attribute and the corresponding geometry (in this case the "Body") instead.
Zoom
- Follow steps 1-4 for Pan/Tilt, but choose the Zoom attribute and the corresponding geometry (in this case the "Beam") instead.
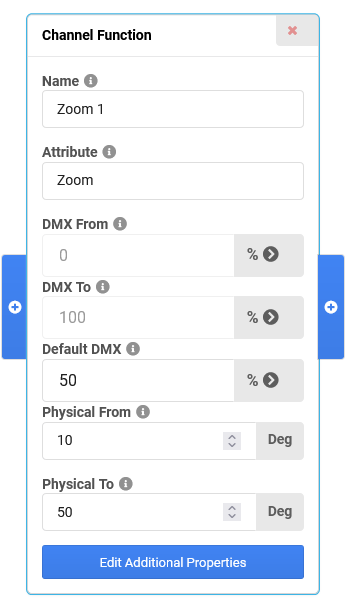
- In the Channel Function of the Zoom channel, set the Physical From and Physical To values as needed, for example From 10 Deg, To 50 Deg.
Adjust the Default DMX value to a common value, for example 50% (equals 30 Deg physical in this case).
Dimmer
- Follow steps 1-4 for Pan/Tilt, but choose the Dimmer attribute and the corresponding geometry (in this case the "Beam") instead.
- As we want our fixture to go to Full if we use the Highlight function on our control desk, enable the Highlight property and enter a value of 100%.

- We also want our Dimmer channel to react to a Grand Master fader, so in the logical Dimmer channel, set React to Master to Grand.

- Now we need to define which real DMX channels will be scaled by the virtual Dimmer.
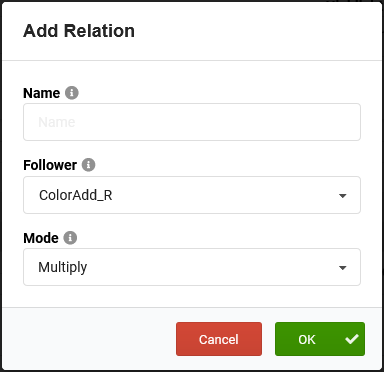
Click on Add Relation. The Add Relation pop-up opens.
- As Follower, select your first additive color channel, for example Beam_ColorAdd_R for the red channel.
Leave the Mode at Multiply, as we want to multiply the Dimmer value with the Color value.
If you don't enter a Name, it will be automatically generated. Confirm by clicking OK.
- Repeat step 5 for all your additive color channels.
In the end, your channels and relations could look like this:
